Renovating your home can breathe new life into your living space. When it comes to creating a stunning and refreshed ambiance, one of the most effective tools at your disposal is ceramic tile installation. In this article, we will explore the power of ceramic tiles and how they can transform your home into a captivating and revitalized haven.
Understanding the Versatility of Ceramic Tiles
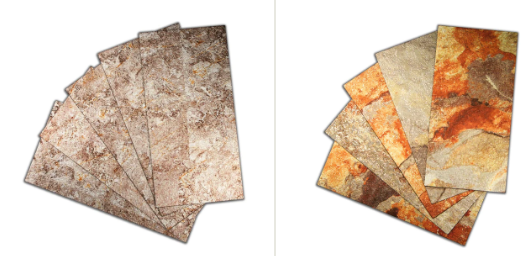
Ceramic tiles are renowned for their versatility, durability, and aesthetic appeal. With an extensive range of shapes, sizes, and designs available, they provide endless possibilities for transforming any room. One popular type of ceramic tile that has gained popularity in recent years is the peel and stick tile, which offers a convenient and hassle-free installation process.
Peel and Stick Tiles: A Game-Changer for DIY Enthusiasts
Peel and stick tiles have revolutionized the world of home renovation, particularly for those who enjoy taking on do-it-yourself projects. These self-adhesive tiles eliminate the need for traditional adhesives and grouts, making the installation process quicker and more accessible. Let's delve into the steps involved in installing peel and stick tiles.
Step 1: Preparing the Surface
A crucial aspect of achieving a flawless tile installation is preparing the surface. Begin by thoroughly cleaning the area to ensure it is free from dust, grease, and debris. A clean and smooth surface provides the ideal foundation for a successful installation.
Step 2: Precision Measurement and Planning
Accurate measurement and careful planning are vital for a seamless tile installation. Measure the dimensions of the area and calculate the number of peel and stick tiles required. Plan the layout, taking into consideration any unique features or obstacles that may require special attention.
Step 3: Cutting with Precision
Inevitably, certain areas will require partial tiles. It is important to cut the peel and stick tiles with precision to ensure a seamless fit. Measure and mark the tiles accurately, and use a tile cutter or utility knife to make clean and precise cuts. Avoid damaging the surrounding tiles during the cutting process.
Step 4: Application of Peel and Stick Tiles
Begin the installation process by removing the backing from the peel and stick tile. Carefully align the tile with the designated area and firmly press it onto the surface. To ensure proper adhesion and eliminate air bubbles or wrinkles, use a roller or tile float.
Step 5: Achieving Alignment and Leveling
Throughout the installation, maintaining tile alignment and leveling is crucial. Utilize tile spacers to create consistent gaps between the tiles, resulting in a professional and uniform appearance. Make any necessary adjustments to preserve straight lines and level surfaces.
Step 6: Adding the Final Touches
Once all the peel and stick tiles are in place, apply pressure to ensure a strong bond with the surface. Trim any excess material using a utility knife or tile cutter. To complete the installation, clean the tiles and remove any adhesive residue or smudges.
Conclusion: A Home Transformed
Ceramic tile installation, particularly with the convenience of peel and stick tiles, offers a remarkable opportunity to breathe new life into your home. By following the steps outlined in this article, you can achieve professional-looking results and create a captivating and revitalized living space. Attention to detail, meticulous planning, and precise execution are essential to a successful tile installation. With determination and creativity, you can witness the transformative power of ceramic tiles in your own home, turning it into a haven of beauty and tranquility.